
Method 1: From the Revest Suite software
- Right-click Revest Suite agent (icon) in the system tray → Open Dashboard.
- Click on Settings.
- Select the Connection option from the left side menu.
- Select the type of the connection you prefer Revest to use when uploading the data. There will be three options there, and you can select more than one of them:
- Wired connection (LAN).
- Wireless connection (WiFi): You can also create a WiFi Safelist, to specify which WiFi connection Revest can use in case you have multiple WiFi connections.
- Mobile connection (PPP, 3G, 4G, etc.).
- Enable the Use SSL option if you prefer to
- Click the Save icon.
Method 2: From the Revest Suite website
This method applies when you are using a policy to control the backup.
- Sign into your Revest Suite online account.
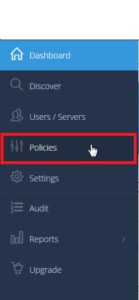
- Select the Policies option from the left side menu.
- Click on the Edit icon (
 ) next to the policy name you wish to edit, or create a new policy.
 - Under the Settings tab, and from the General Settings section, select the type of the connection you prefer Revest to use when uploading the data, from under the Only allow Revest to upload on option. There will be three options there, and you can select more than one of them:
- Wired connection (LAN).
- Wireless connection (WiFi): You can also create a WiFi Safelist, to specify which WiFi connection Revest can use in case you have multiple WiFi connections.
- 3G connection (PPP).
- Click the Save button to save changes.